Windows、macOS、iPhone
illustration:あまとうこ
.png)


ARTICLES News & Products
ABOUT What is nizima LIVE?

A face tracking application that anyone can easily move a Live2D model in sync with their facial expressions and motions.
Whether you're a beginner or a professional, you can enjoy it for various purposes such as VTuber activities and video conferences.
-
High tracking accuracy
-
Official Live2D tracking app
-
Intuitive design
-
Detailed customization is possible
Achieve high-quality motions with user-friendly interface
nizima LIVE is a tool that anyone can easily become a VTuber with simple operations.
This official tracking application from Live2D Inc. can achieve high-precision tracking with intuitive operations and design for ease of use.
If you are already a VTuber, you can quickly create your favorite motions with nizima LIVE using the detailed customization function of Live2D models.
nizima LIVE is the best VTuber tool to help you with your VTuber activities.
FUNCTION Main Features
High tracking accuracy
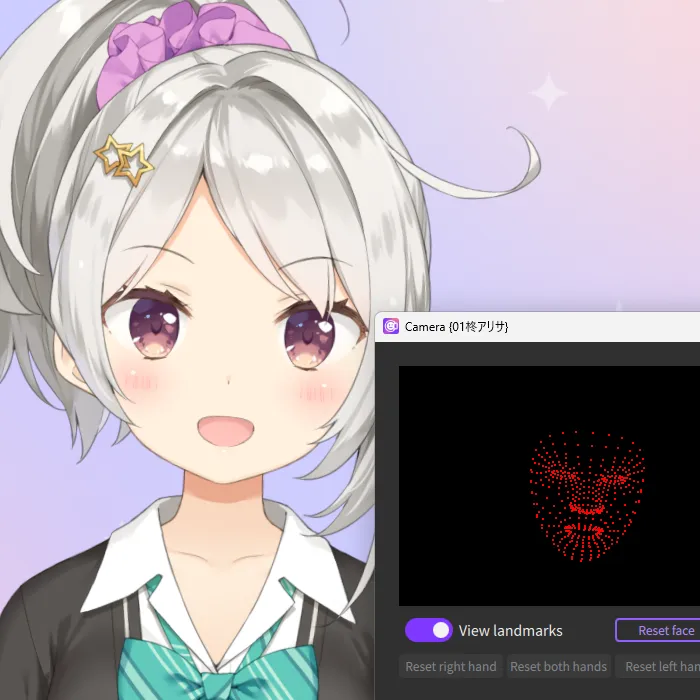
High tracking accuracy
nizima LIVE precisely tracks your facial movements, bringing the Live2D model to life in an enchanting manner. There's no risk of face reveal on camera. If you connect to the iPhone app "nizima LIVE TRACKER" and use your iPhone as a camera, you can achieve even higher accuracy of motions than with a webcam.
With a model compatible with Perfect Sync, richer expressions can be tracked such as "puffing out your cheeks" and "moving your mouth left and right."
Intuitive interface

Intuitive interface
With a simple and refined design, nizima LIVE is easy to operate even for those who are new to tracking apps.
All primary operations, such as switching models, camera settings, parameter settings, can be done from the menu bar on the left side of the interface.
Even if you don't have any knowledge of technical terms or settings, you can start enjoying Live2D models immediately after downloading the software.
More precise tracking adjustment
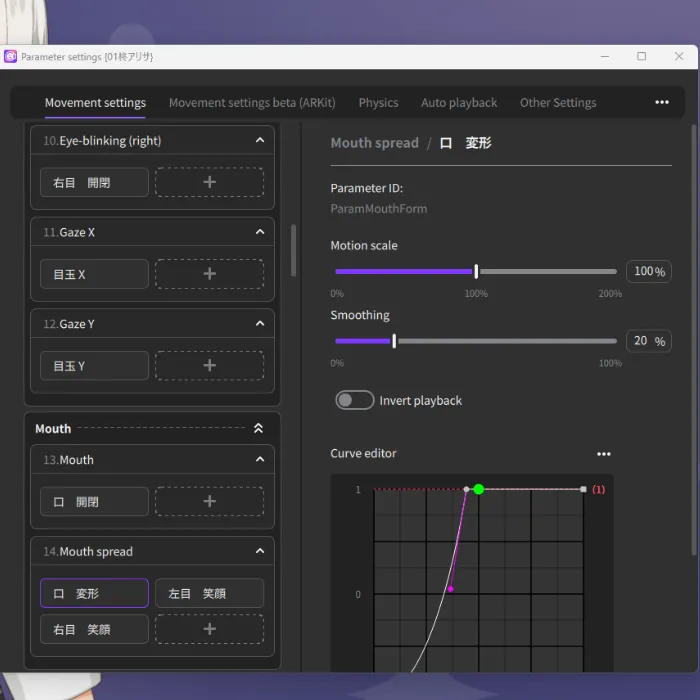
More precise tracking adjustment
With the parameter adjustment function, you can make adjustments to the movements, from eye blinks and lip sync to the sway of hair, by adjusting each parameter in detail.
By fine-tuning according to your facial movements, you can achieve even more natural and attractive movements!
We offer a variety of funtions to improve the quality, such as a lip-sync function that allows to lip-sync based on your voice instead of camera tracking, and a function that neatly complements the eye blinks on both sides with a single button.
You can also link the tracking items and Live2D model parameters on nizima LIVE.
Item feature
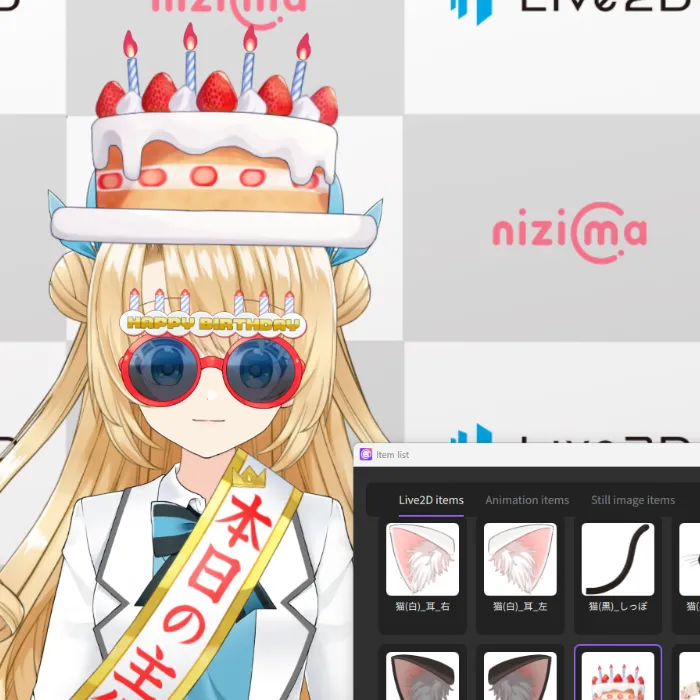
Item feature
You can use Live2D items, animation items, and static image items to liven up your VTuber stream.
You can easily change your impression without having to change your model by using items such as cat ears and sunglasses!
We have over 100 high-quality preset items that are easy to use for streaming and SNS posts. Of course, you can also import items you purchased on nizima or your own data.
Collaboration feature

Collaboration feature
By creating a collaboration room and participating in it, you can easily display each other's Live2D models on the screen with up to 8 users.
Compared to screen sharing with calling apps, you can deliver clearer and more high-quality collaboration streams to viewers.
If there is at least one paid plan user in the same collaboration room, even free users can enjoy the Collaboration feature without worrying about time limits!
FLOW How to use
-
01
Install nizima LIVE
You must create a nizima account (free) to use the app. -
02
Select or import the model you want to use
There are many sample models available, so let's try them first. Of course, it's also easy to import your own Live2D
-
03
Turn on camera tracking
Webcams and iPhones are both supported. -
04
Connect to a streaming software
Use a streaming software such as OBS Studio to capture the interface of nizima LIVE. -
05
It's time to stream!
Starting today, you can become the VTuber you've always dreamed of.
PLAN Pricing Plan
Please try our free plan first!
-
nizima LIVE
for indiePlan for individuals & small enterprises(※ For those with annual sales of less than 10 million yen)¥55020% off if you sign up for a year!1 user/month -
nizima LIVE
for businessPlan for medium & large enterprises(※ For those with annual sales of more than 10 million yen)¥3,30020% off if you sign up for a year!1 user/month