-> Glossary
Prepare ZIP file
Use the Cubism Editor to output a ZIP file for nizima posting.
Note: Only Cubism 3.2.04 or higher versions are supported.
1. open the cmo3 file in Cubism Editor and select [File]-[Export for Embedded Use]-[moc3 File Export].

2. On the Export Settings screen, make the necessary settings for export and select [nizima] in the Export Type pull-down menu.

For information on exporting, see [Exporting]-[Data for Embedded Use] in the Cubisum Editor Manual.
3. the export settings for nizima will open, select the model name and preview size.

4. Click the [OK] button.
5. Three files, [export.zip], [original.zip], and [preview.zip], will be generated in the selected folder.

export.zip: Non-editable Live2D model files
original.zip: editable Live2D model file
preview.zip: Preview file displayed on the work detail screen
-> How to post a work
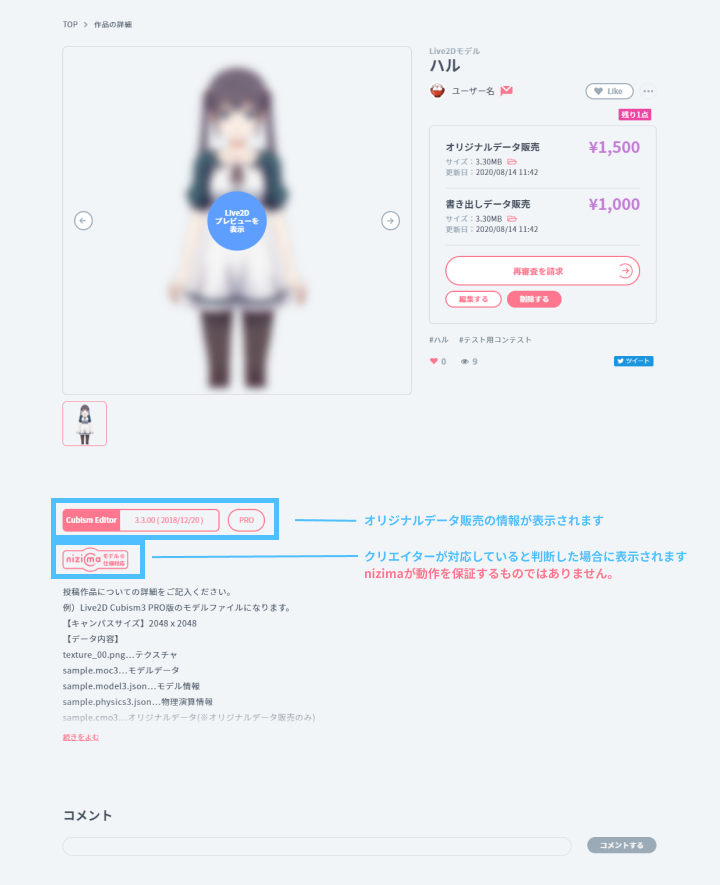
Note: Only “preview.zip” can be uploaded when posting a gallery. When selling export data “export.zip” or original data “original.zip”, “preview.zip” should be posted at the same time, so that the Live2D model preview will be displayed in the work details.
Advantages of exporting with [nizima] by export type

Change texture size for preview only in export settings in nizima.
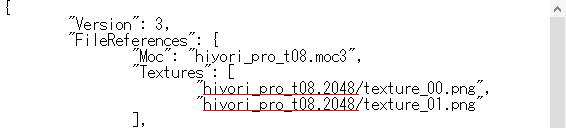
Here is a comparison between exporting one by one with the SDK and exporting with nizima, where the folder names of the textures are different
| When exported one by one by SDK | When exported together in nizima | |
|---|---|---|
| For preview | .512 | textures |
| For export | .2048 | textures |
| For original | .2048 | textures |
model3.json contains the file paths (folder/file names) to the textures
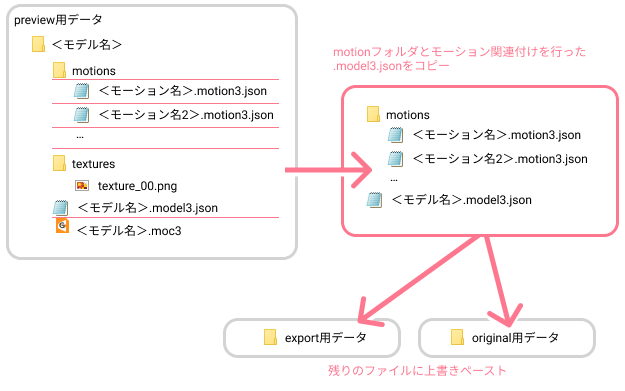
If the folder names of the textures are common, then the paths to the model3.json files that are associated with the motions and expressions in the Viewer and saved will all be the same.
If you want to use exactly the same “motions and expressions” in the original, export, and preview, save the model3.json in preview.zip with the motions and expressions associated with it in the Viewer, and then save the “motions and expressions” file as the same file as shown below. configuration, you can easily reflect the settings by overwriting the model3.json in preview.zip with the model3.json in export.zip and original.zip.
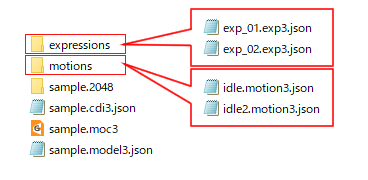
-> Include motion files in Live2D Models
Upload
Upload the created ZIP file to nizima.
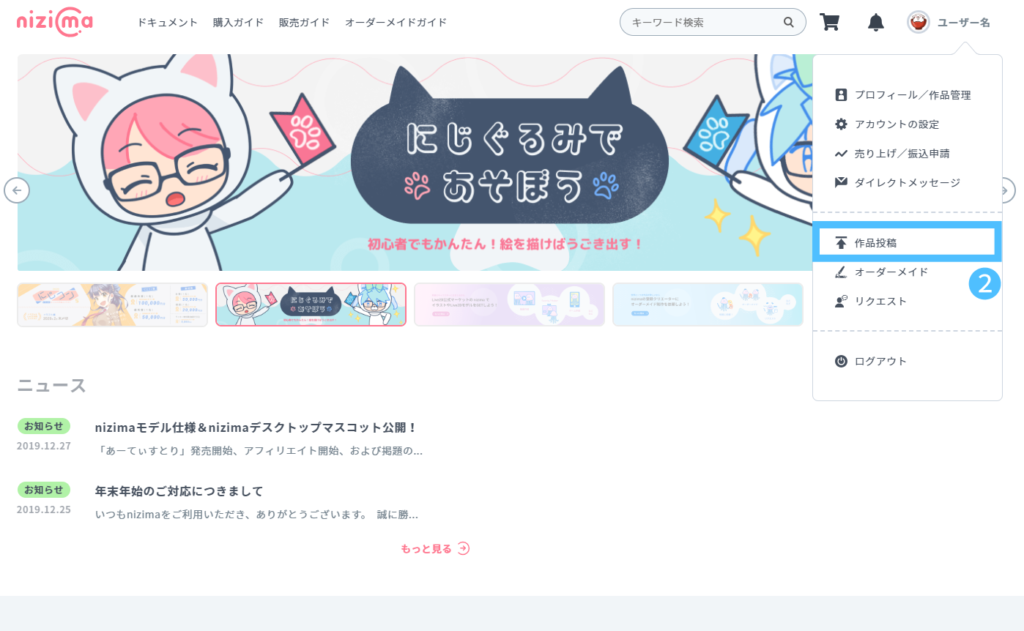
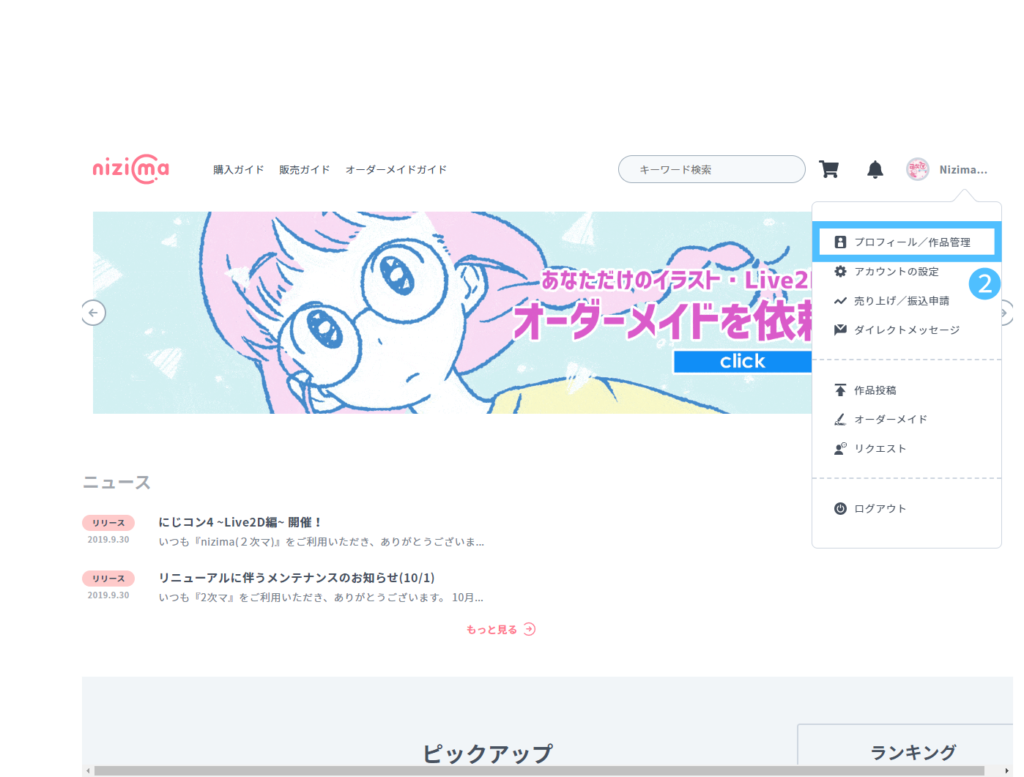
1. access nizima and sign in.
2. Click on “New Post” in the upper right menu.
3. Select “Live2D Model Post” from the tab menu.

4. Drag and drop files or select files to upload from the Choose File button.
The files that can be selected here are as follows
Export data (export.zip)
Original data (original.zip)
Preview data (preview.zip)
Image for preview
One of the following is required: “exported data or original data”. At least one image for preview is required.
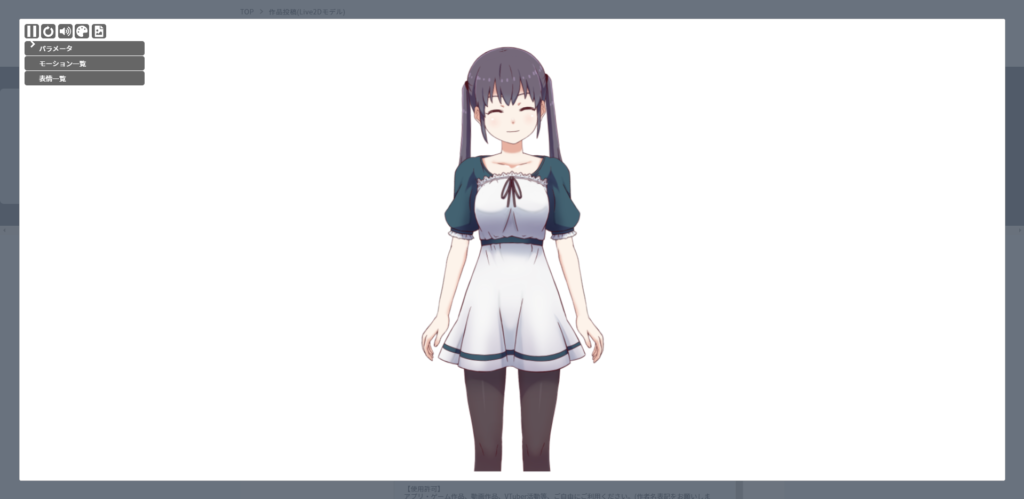
Live2D preview screen
Click on “Show Live2D Preview.
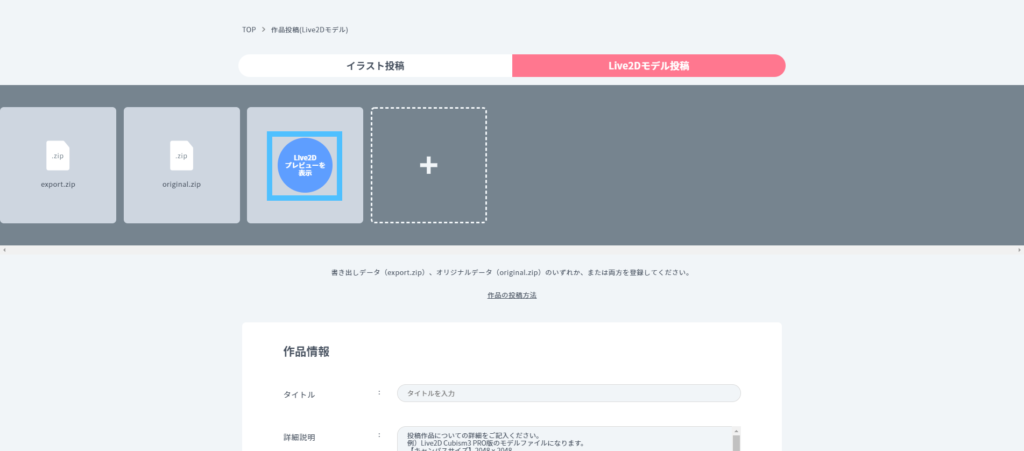
Click “Show Live2D Preview” to open the Live2D Preview window in modal mode. Please confirm that the parameters and motions are working properly in the Live2D preview.
Set up related maps
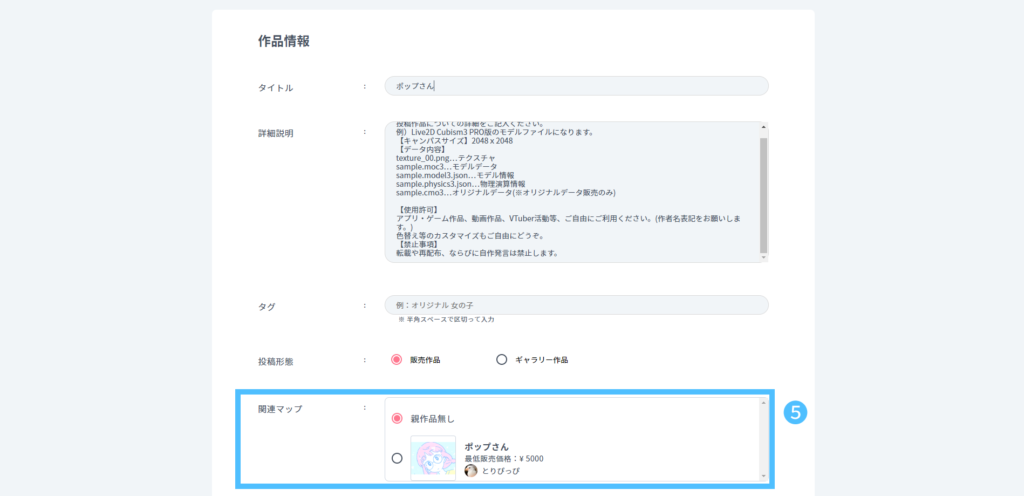
5. Select the original illustration from the related map.
This is necessary to distribute royalties to illustration creators, so be sure to set this option.
This setting is not necessary for those who also create their own illustrations.
Purchased illustrations will appear on the Related Maps. Please select the appropriate illustration from the list of related maps.
If you do not see your illustration in the list, you may not have completed the purchase of your illustration.
Please purchase the corresponding illustration and start your post over.
After entering the title and other input items and registering the thumbnail image, click the “Post” button.
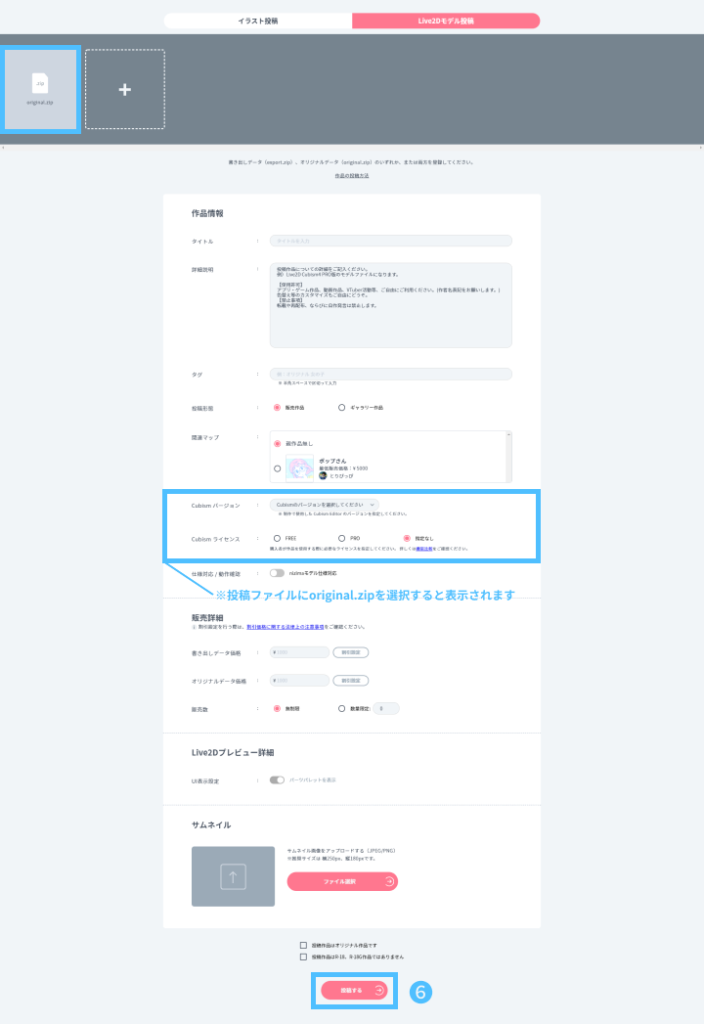
It may take a while depending on the file size and network conditions.
Please wait a moment without clicking more than once.
7. When the upload is complete, the work detail page will appear.
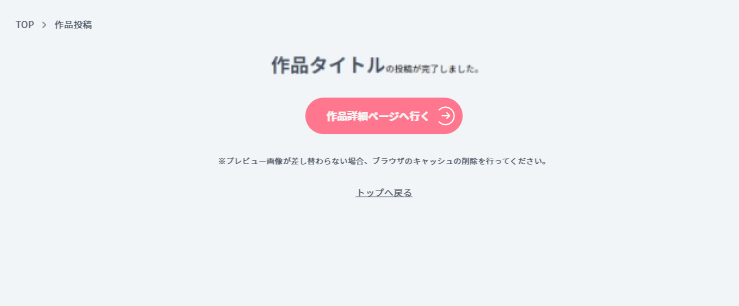
8. please make sure that the information you have posted is correct on the work details page.
From this state, the review process begins.
You will be notified of the results of the review by e-mail within approximately 3 business days.
Selling start
Once the screening process is complete, the sale will automatically begin.
When you receive the e-mail, please check to see if the item is “Selling” (ready to be added to your cart).
1. access nizima and sign in.
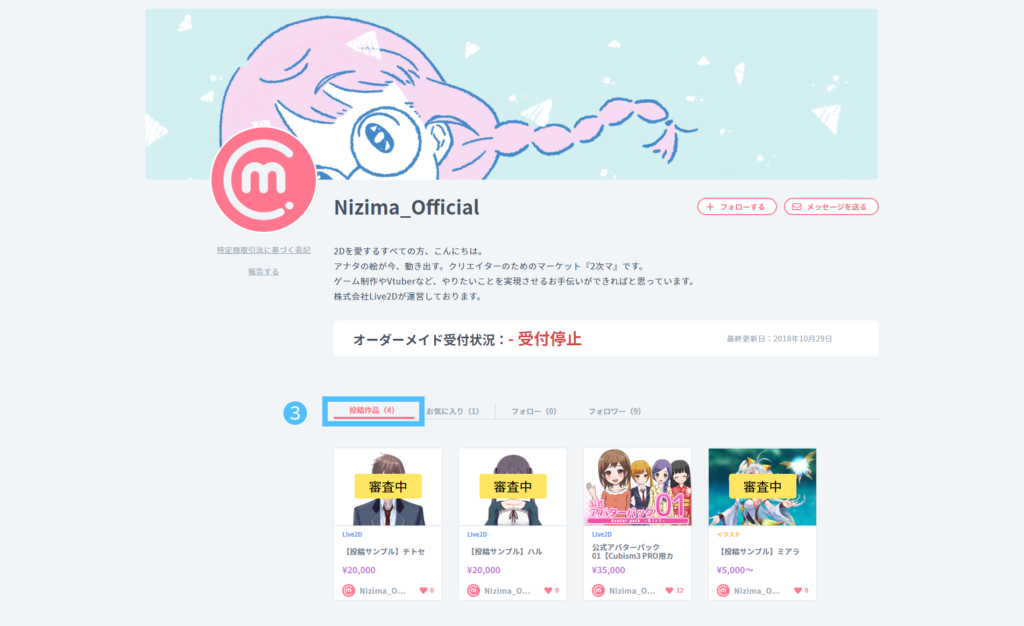
2. Select “Profile/Work Management” from the menu in the upper right corner.
3. Click on ” Works Posted” from the tab menu, and a list of works you have posted will be displayed at the bottom of the page.
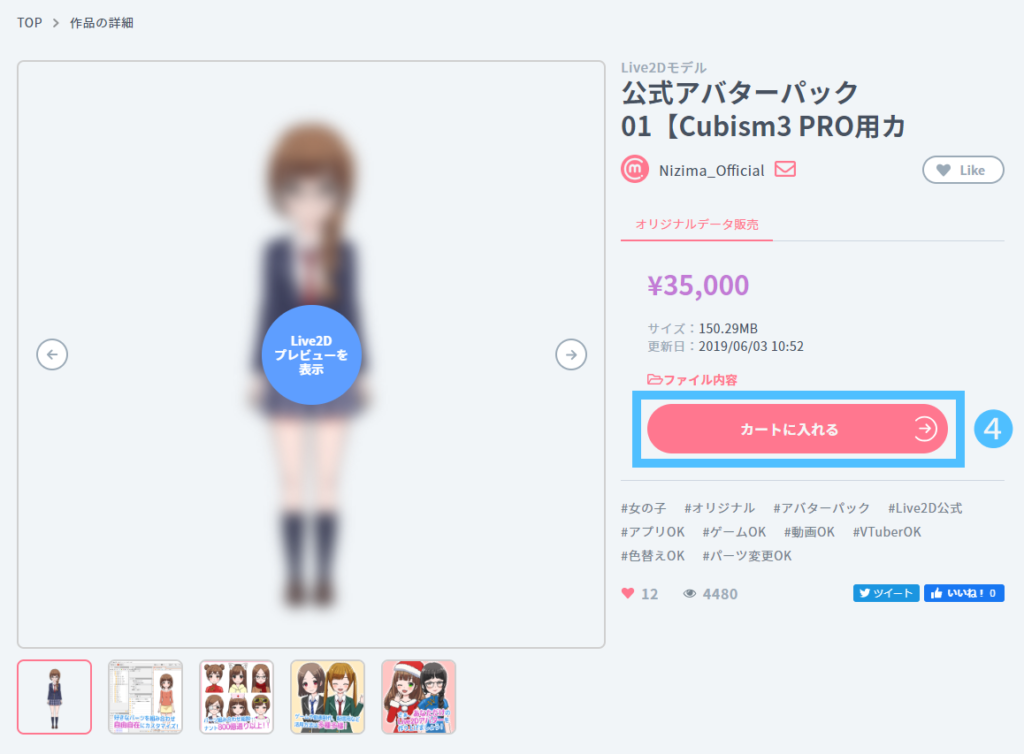
4. Click on the appropriate work in the list of postings and confirm that the “Add to Cart” button is displayed.
Include motion in Live2D models
To animate a Live2D model in a specific way, you must create an animation in the Cubism Editor and associate it with the model in the Cubism Viewer.
The following is an example of attaching the motion file “xxx.motion3.json” output from the Cubism Editor to the Live2D model data “xxx.model3.json” included in the exported “preview.zip” file. For details on how to create and export animations, please refer to the Cubism Editor manual site.
1. unzip the preview.zip file.
2. Create a [motions] folder in the extracted folder and copy the motion files.
When checking the file name, please confirm it by displaying the file extension.
Please check the instructions for your environment for how to display the extensions.
3. Open the moc3 file in “Live2D Cubism Viewer“.
If a program with the extension “moc3” is associated with Cubism Viewer when Cubism Editor is installed, Cubism Viewer can be launched and edited by double-clicking the moc3 file.
4. Drag and drop the [motions] folder into “Live2D Cubism Viewer“.
5. go to [File]-[Export]-[Model Settings] to overwrite and save the model settings.

6. Recompress the preview folder.
If you do not understand a term, please refer to the glossary.